Soft, buttery, and slightly sweet, these Skinny Dinner Rolls are out-of-this-world delicious and only 70 calories each!

Believe it or not, it’s actually pretty easy to make your own dinner rolls. The hardest part is waiting for the dough to rise. Actually, the hardest part might be waiting for them to cool enough to eat right out of the oven. The way these make your house smell is worth the wait!
If you’ve made my Light Brioche Buns, then this recipe will look pretty familiar. These are way more fool-proof than the buns, though. Since these rise to the point where they are touching each other, they won’t deflate on you when you put the egg wash on.
Plus, this can be made ahead! Perfect for a busy holiday dinner.
How to make the dough
It’s easiest to make these rolls if you have a stand mixer, but don’t worry if you don’t I’ve used a food processor before and it worked just fine.
You start by mixing up the dry ingredients, then adding the butter and mixing until it is dispersed through the flour mixture. Then, add your wet ingredients and let the mixer knead until a smooth dough forms, about 3-5 minutes.
If using a food processor, pulse until the dough pulls from the sides of the bowl and forms together, about 2-3 minutes.
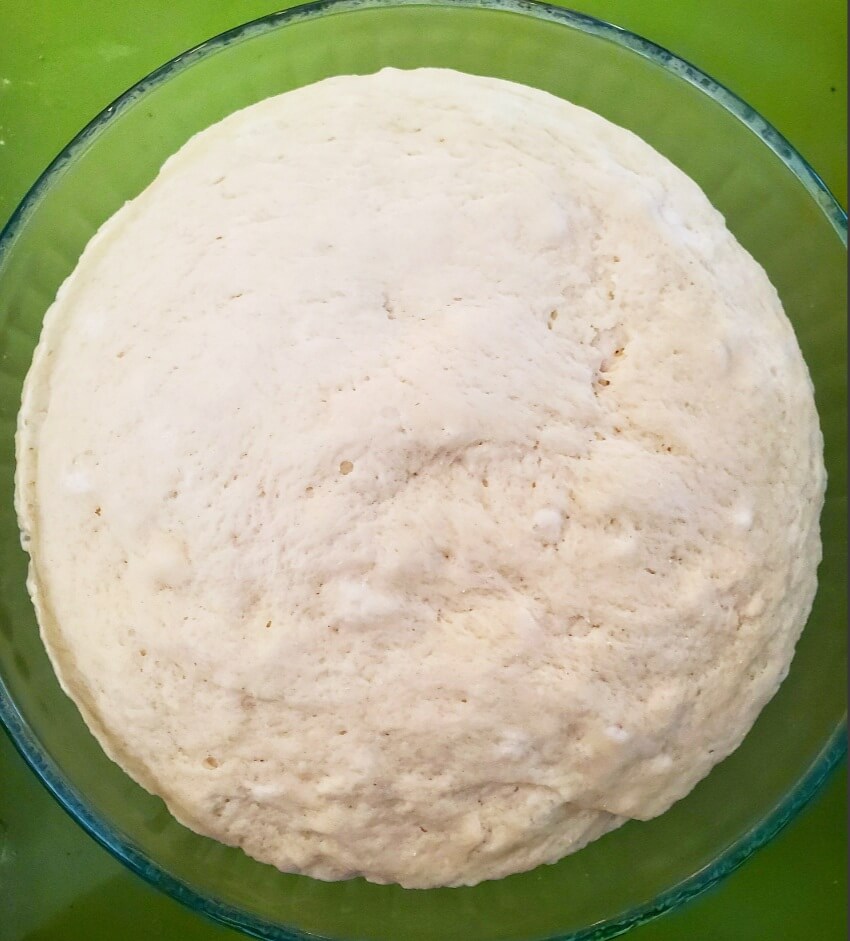
In order to get that soft and fluffy texture, we’re going to let the dough rise twice. When you first mix it together, it should look like this:

Cover and let the dough rise in a warm place for about an hour, or until it has more than doubled in size. If you’re working in a cold kitchen, let your oven heat for a minute or two, turn it off, then let your dough rise in there.
It should look like this, with lots of air bubbles:
Now you’re ready to form your dough balls. Cut and form into 24 balls. Divide the dough into half, then divide each half into 6ths. Cut each 6th in half, and there you go!
Line them up in a 13×9 baking dish. I do six rows of four rolls each. Space them as evenly as you can, then cover and let rise again for another hour. They should look like this:

Gently top with egg wash you’re good to go! They’ll continue to rise a little bit as they bake. If you’re having a hard time getting them to brown on top, just broil for 30 seconds or so.

Can I make Skinny Dinner Rolls ahead of time?
Yes! They reheat beautifully, either in the microwave or in the oven.
If you’re looking to prep the dough ahead of time for fresh-baked rolls, you can make the dough the day before. Follow the recipe up to the point where you’ve formed the rolls in the baking dish. Cover and refrigerate over night.
Just make sure you take them out of the refrigerator about 30 minutes before you want to bake them to allow the rolls to come to room temperature. Otherwise, they won’t bake evenly.

Can I Freeze Skinny Dinner Rolls?
Yes! The recipe makes 24 rolls, which is A LOT. But if I’m going to go through the trouble to make my own rolls, I want to make sure I have a lot of them. I always end up freezing about half of the recipe.
You could separate them all and freeze individually, or freeze a whole section of them. Wrap with with aluminum foil, then wrap again with plastic wrap. This should prevent them from freezer burn for up to a month.
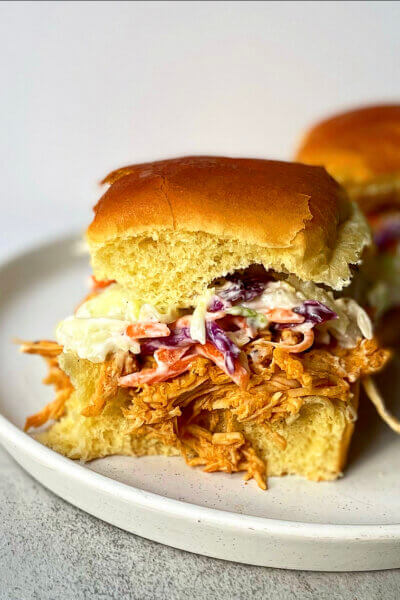
Reheat in the microwave or oven for quick rolls! We love to use them as slider buns, too. Leftovers would be great in a french toast casserole or as the base for Sausage and Apple Stuffing!

I’d love to hear from you if you make this recipe! It makes my day when you share your pics on Instagram and tag me (@litecravings). Don’t forget to use #litecravingsrecipes to make sure I see it. If I don’t get a chance to scroll through my tags quickly enough, I won’t see your post. I always make a point to look through the hashtags, though, so I’ll see it there.
Skinny Dinner Rolls
Ingredients
- 3 1/3 cups + 2 tbsp all-purpose flour
- 1 tbsp sugar
- 1 tbsp instant yeast
- 1 1/2 tsp kosher salt
- 2 tbsp light butter (I used Earth Balance Whipped)
- 1 cup warm water
- 2 tbsp almond milk (skim milk will work)
- 2 eggs, divided
- 2 tbsp flour, or kneading the dough
Instructions
- Whisk together flour, salt, sugar, and yeast in your large bowl. In a microwave-safe measuring cup, add water and milk. Microwave for 45 seconds, until very warm. Whisk 1 egg in separate bowl.
- Set your mixer on low, then add in light butter. Mix for about a minute, or until butter is distributed through flour mixture.
- Turn the speed up to medium and slowly add in your wet ingredients, including the whisked egg. "Knead" the dough with your mixer for about 5 minutes, or until dough is slightly elastic. (See blog notes for using a food processor instead.)
- Use a spatula to form the dough into a ball. Cover and let rise in a warm place until more than doubled in size, about 45 minutes-1 hour.
- Dust a cutting board with 1 tbsp flour. Use the extra tbsp to flour your hands. Scrape the dough onto your cutting board and knead just until the dough is not as sticky.
- Grease a 13×9 baking pan. Cut dough into 24 portions, roll each into a small disk, and place in your baking pan. You should have 6 rows of dough balls, 4 of each across (see picture above).
- Cover and let rise again. The rolls should rise until they are fully touching each other.
- Preheat oven to 350F Whisk remaining egg with 1 tbsp water. Lightly brush tops of rolls with egg wash. Bake for 20-25 minutes, broiling in the last 30 seconds if the tops aren't brown enough.

















These look amazing…and I am glad you are back posting. I have missed your posts!!!! Stay safe and Happy Holidays!!!!!
These are so good (and easy to make)! My husband ate about 6 with dinner, and my daughter said this was the best part of thanksgiving dinner.
These rolls are the bomb. My husband (who “doesn’t like” light food) asks for them at least once a week. I even too a batch to a friend’s socially distanced Christmas Even dinner. I didn’t tell anyone they were a lighted up recipe and everyone raved about them. These are on permanent rotation at my house now 🙂
That’s amazing! I can’t believe how tender and slightly sweet they are with minimal butter and sugar.
Does this call for 3 1/3 CUPS plus 2 tbsp flour? It shows up on my computer ass “31/3 + 2 tbspall-purpose flour”? but I think it might be displaying your recipes wrong because none of them have spaces between the measurement and ingredient, maybe it also cut off the “cup”?
That should all be fixed now! There was a weird glitch on the site the past few days, but it’s working better now. Yes–3 1/3 cup plus 2 tbsp. 🙂
Ah yes, the spacing is much better now! Thank you for the clarification too! Cant wait to make these, they look so fluffy and delicious.
I was going to ask the same thing – it’s still showing up as 3 1/3 without the cup added. These look amazing, saving to try once the in-laws have gone home
First let me say thank you for your amazing recipes, I don’t know what I would do without them!! For this one, just a question about the point value. It says 2 points per roll but also says that 2 rolls are 2 points? Should it be 4 points for two rolls?
Oops yes! I’ll update that now. Thank you!
These look amazing! I’m going to make them to go with our Easter dinner, but wanted to clarify which mixer attachment you used…I’m thinking dough hook, but I don’t want to do the wrong one and mess things up. Thanks!
Dough hook or paddle works! I’ve tried both but the dough hook is probably best if you have it. Hope the rolls work for you on Sunday!
Omg i hardly ever find something on the internet i can properly and these came out so darn good thank you so much for the recipe..
Yay!! This makes me so happy. 🙂
So i went to make a second time and wasn’t paying attention and used both eggs in the recipe lol
Can this be made without a stand mixer or food processor?
You can make it without a stand mixer or food processor, but it will take a significantly longer amount of time or mixing and hand-kneading the dough to get to the right consistency.
How would one go about doing this in a bread machine? I’m lazy and love to let my machine do all the kneading and rising 🤣
I’ve never used a bread machine, so I have no idea! If you want a way to make it work, please let me know!